

How To Create Adjustment Layer In Photoshop
Adjustment Layers in Photoshop and Why You Should Use Them

In this tutorial, I prove y'all all the reasons why you lot should stop using standard prototype adjustments and start using adjustment layers when editing images in Photoshop!
Photoshop includes lots of different image adjustments that make it like shooting fish in a barrel to edit the brightness, contrast or color of an image. About of these adjustments come in two flavors—adjustment commands and aligning layers. And both can achieve the same results. Merely while adjustment commands make permanent changes to your image, adjustment layers do not.
What are aligning layers?
An adjustment layer is a special kind of layer in Photoshop that keeps the image and the aligning existence applied to the image separate from each other. The adjustment sits on its ain layer above the paradigm layer, and the entire effect is independent within the aligning layer itself.
You lot can edit an aligning layer'southward settings, change the opacity or blend style of an adjustment layer, or turn the adjustment on and off to compare the result with the original paradigm. And yous tin can even delete an aligning layer, all without making a single permanent change to your photograph.
In this tutorial, nosotros'll await at all the reasons why adjustment layers are a better, safer and more than flexible way to edit your images than Photoshop's standard image adjustments. And at the stop, I'll show you how to relieve your work and then that your aligning layers don't disappear as soon every bit you shut Photoshop!
I'm using Photoshop 2021 merely everything nosotros'll exist learning about adjustment layers applies to all contempo versions.
Allow'south get started!
The document setup
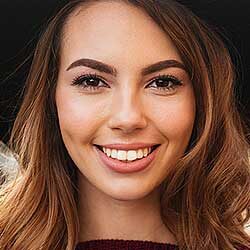
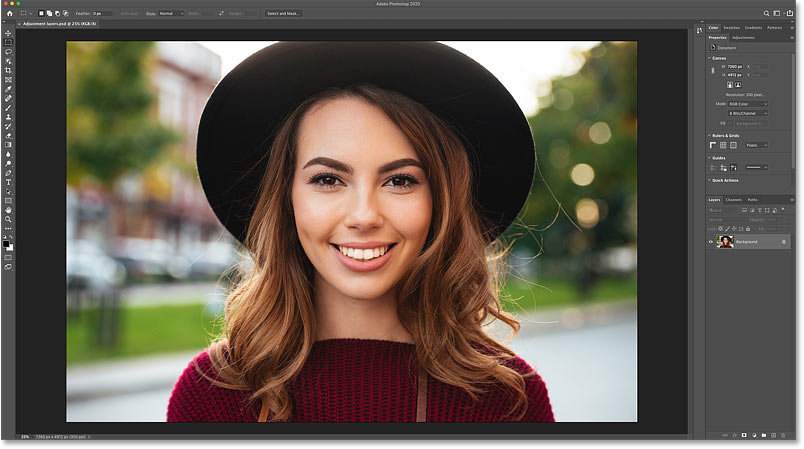
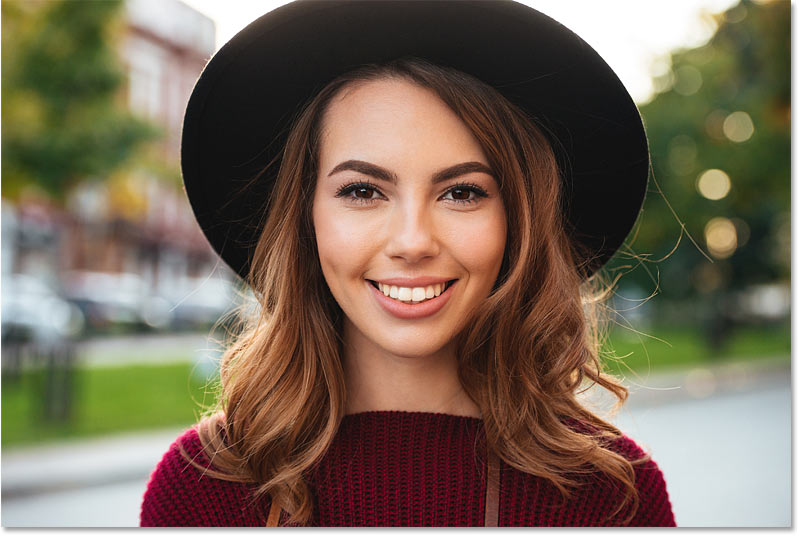
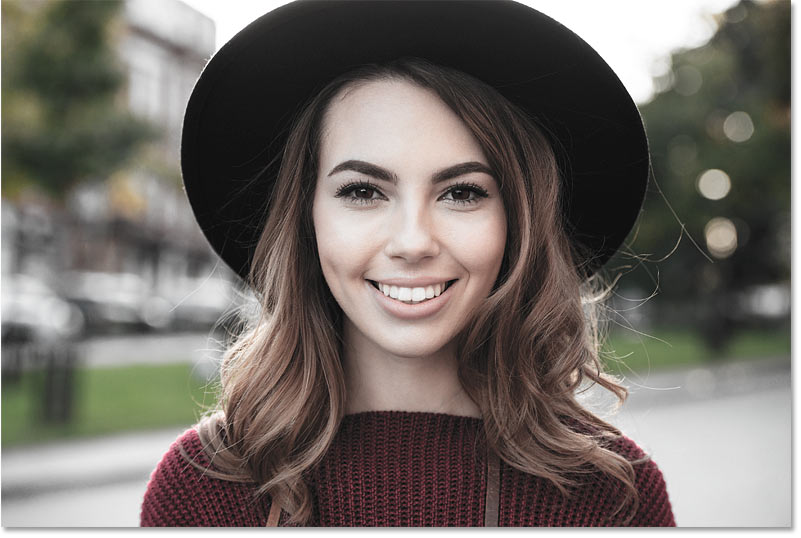
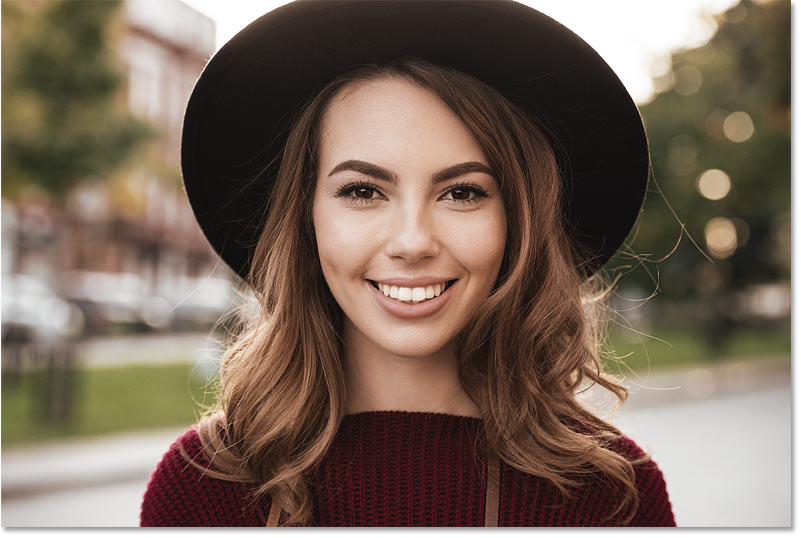
To follow along, you lot can open any epitome in Photoshop. I'm using this image from Adobe Stock:

The original image.
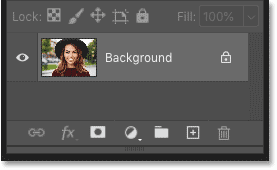
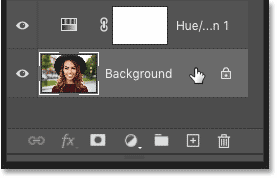
In the Layers panel, we run into the image on the Background layer:
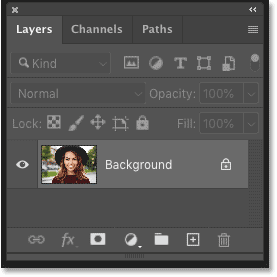
The Layers panel.
Related: Learn all the ways to get your images into Photoshop
The problem with Photoshop'southward image adjustments
Before we go to adjustment layers, let's take a quick look at Photoshop's standard image adjustment commands and why they're not the all-time way to work.
Where do I find the image adjustments?
All of Photoshop's standard image adjustments are institute by going up to the Epitome menu in the Bill of fare Bar and choosing Adjustments:
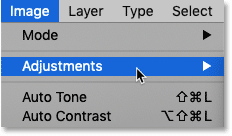
Going to Prototype > Adjustments.
Here yous'll find the complete list of adjustment commands.
Some, like Levels and Curves, are used for adjusting the brightness or contrast of an prototype. Others, similar Hue/Saturation and Color Balance, are for changing the colour. And a few of them, like Posterize and Gradient Map, are more for creating certain effects.
Almost of these epitome adjustments are besides available as adjustment layers, as we'll see in a moment:
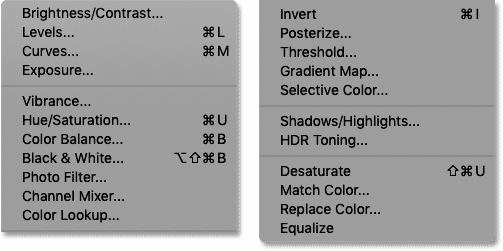
Photoshop'southward standard paradigm adjustments.
How to apply an prototype adjustment
To use an adjustment, simply choose information technology from the listing. I'll cull Vibrance:
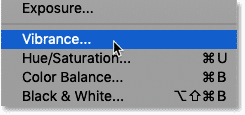
Adding a Vibrance image aligning.
Photoshop opens a dialog box where yous can edit the adjustment settings. And the settings bachelor will depend on which aligning you lot cull.
The Vibrance adjustment offers two sliders, Vibrance and Saturation. Both are used to increment or decrease the intensity of the color. The difference is that Saturation affects all colors equally while Vibrance affects muted colors more than colors that are already saturated.
I'll drag the Saturation slider all the way to the left to lower the saturation down to -100. Then I'll click OK to have information technology and close the dialog box:
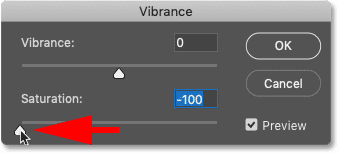
Lowering the Saturation value to -100.
And with the color completely desaturated, the paradigm now appears in black and white:
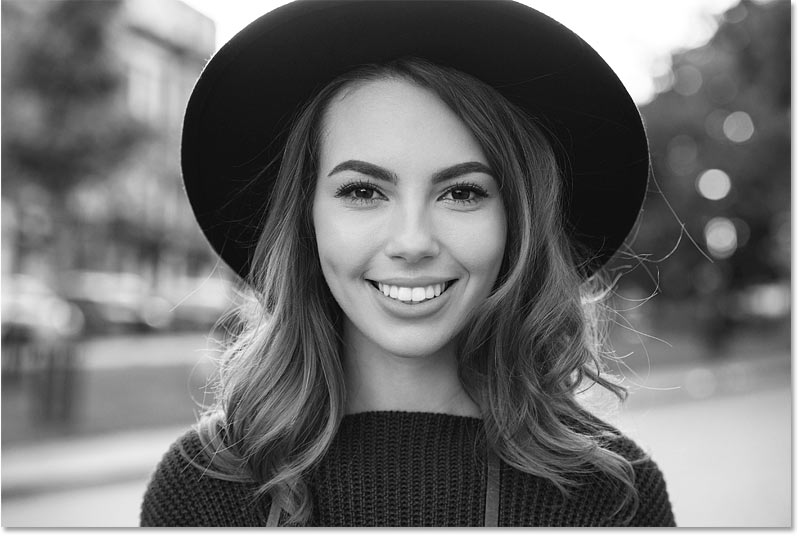
The result after desaturating the color.
Image adjustments make permanent changes
But here's the trouble. In the Layers console, we come across that the Vibrance adjustment was applied directly to the image itself. And this means that the original color image is now gone. It's been replaced by the new black and white version.
There's no way to edit the adjustment settings to bring dorsum some of the color, or delete the aligning if I determine downwards the road that I don't like information technology. And if I was to salvage the image at this point and so close Photoshop, my original colour paradigm would be lost forever.
This is why Photoshop'southward standard paradigm adjustments are called "destructive" edits. Not considering they brand the epitome look worse but because any changes they make are permanent:
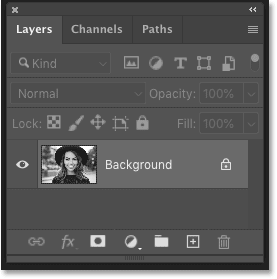
The adjustment was applied directly to the image layer.
How to remove an image adjustment
In fact, the only style to remove an image aligning after you've applied it is by going up to the Edit menu and choosing the Undo command.
But even the Disengage control is only temporary. If more edits had been made to the prototype since applying the aligning, then all of those edits would demand to exist undone to get back to the point earlier the adjustment was practical.
And once you save the epitome and close Photoshop, any chance to disengage the adjustment is lost along with your original epitome:
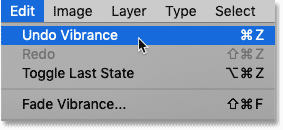
Going to Edit > Undo Vibrance.
How to employ adjustment layers in Photoshop
And then that'due south why Photoshop'due south standard prototype adjustments are not the best style to work. They make permanent and subversive changes, and the original image is lost forever. Let'southward compare that with adjustment layers and acquire why aligning layers are and so much improve.
I've undone my Vibrance aligning (Edit > Undo Vibrance) and at present I'm back to the original color paradigm:
The original image once again
How to add an adjustment layer
In that location are 3 ways to add an aligning layer in Photoshop.
From the Menu Bar
One is by going up to the Layer carte in the Bill of fare Bar and choosing New Adjustment Layer:
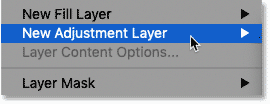
Going to Layer > New Adjustment Layer.
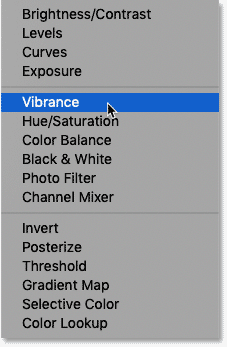
And hither y'all'll observe the complete listing of adjustment layers. To add 1, select it from the list. But don't do that just yet considering we take ii more than ways to look at:
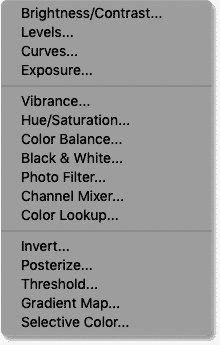
The listing of Photoshop'due south adjustment layers.
A quick comparison between the aligning commands (Image > Adjustments) and the adjustment layers shows that almost all of Photoshop's standard image adjustments are too bachelor as adjustment layers.
Only six (circled in cerise) out of the twenty two epitome adjustments are unavailable:
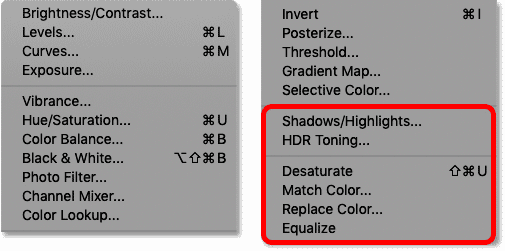
The half-dozen image adjustments not currently offered as adjustment layers.
From the Adjustments panel
Another way to add an aligning layer is from Photoshop'south Adjustments console. By default, the Adjustments console is grouped in with the Properties panel (which nosotros'll wait at in a moment).
If you don't see the Adjustments panel, you tin open up it by going up to the Window bill of fare and choosing Adjustments. But a checkmark adjacent to its proper name means that the panel is already open up, and choosing information technology from the list will close the panel:
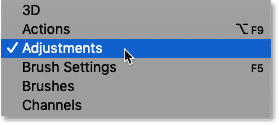
Going to Window > Adjustments.
In the Adjustments console, the adjustment layers are displayed equally icons. To add one, simply click on its icon.
Of grade, you lot'll need to remember which icon is which. For case, the Vibrance adjustment layer is the icon on the far right of the top row. It'due south easy to remember because it looks like a letter 5:
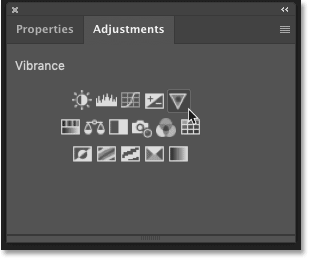
The Adjustments panel displays adjustment layers as icons.
But if you can't remember which icon you demand, click the Adjustments panel menu icon:
Clicking the panel'southward menu icon.
And each adjustment layer is listed in the card:
The list of adjustment layers in the panel menu.
From the Layers panel
The third way to add an adjustment layer, and my personal favorite, is from the Layers panel.
Click the New Fill up or Adjustment Layer icon at the lesser of the Layers panel, and and so choose an adjustment layer from the listing:
Clicking the New Fill or Adjustment Layer icon.
Make full layers vs aligning layers
Only note that the proper noun of this icon is New Make full or Aligning Layer. That'due south because the kickoff three items in the listing—Solid Color, Gradient and Pattern—are fill layers, not adjustment layers. Choosing 1 volition only fill the document with either a solid color, a slope or a pattern.
Fill layers share the same benefits as adjustment layers, but they are not really paradigm adjustments. So for this tutorial, nosotros'll ignore them:
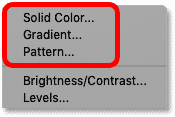
The three fill layers appear at the superlative.
Choosing an adjustment layer
Since nosotros're comparing adjustment layers with Photoshop's standard image adjustments, I'll choose the same Vibrance adjustment:
Choosing a Vibrance adjustment layer.
And this time, instead of the adjustment being applied directly to the image, it appears as a separate aligning layer above the image:

The adjustment layer is added above the paradigm layer.
Where exercise I notice the adjustment layer settings?
Unlike standard paradigm adjustments where the settings open up in a separate dialog box, the settings for adjustment layers appear in Photoshop's Properties panel.
And here we encounter the aforementioned 2 sliders—Vibrance and Saturation—that nosotros saw earlier:
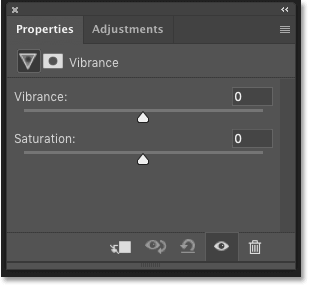
The adjustment layer options in the Properties panel.
I'll desaturate the color by dragging the Saturation slider all the style to the left, just as I did earlier.
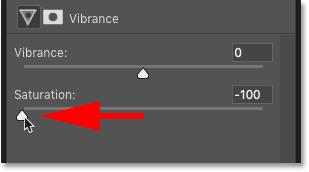
Lowering the Saturation value.
And we get the same result every bit before with the image at present in black and white:
The outcome afterward desaturating the image with the adjustment layer.
The benefits of using adjustment layers in Photoshop
But while the initial results from the standard prototype adjustment and the adjustment layer are the aforementioned, the adjustment layer offers many important advantages.
Adjustment layers are separate from the prototype
Equally we've already seen in the Layers console, aligning layers are separate from your image. They sit above the paradigm layer and the entire issue is independent within the adjustment layer itself, while the original image below the adjustment layer remains unharmed:
Adjustment layers are separate from your image.
Adjustment layers tin be turned on and off
You can turn an adjustment layer on and off to compare its effect with the original image past clicking the layer'southward visibility icon (the eyeball) in the Layers panel:
Turning off the adjustment layer.
With the Vibrance adjustment layer turned off, the original color image is instantly restored.
Turning off the adjustment layer restores the original prototype.
I'll plow the adjustment layer dorsum on by clicking in the empty box where the visibility icon would normally appear:
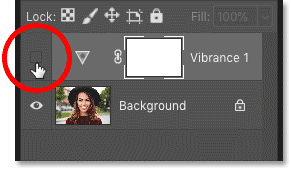
Turning on the adjustment layer.
And now I'm back to the desaturated version of the epitome:
Turning the layer back on restores the adjustment.
The adjustment layer settings are editable
A big advantage with adjustment layers is that the initial settings we cull are non permanent. We tin can go back to the Properties panel and edit the settings at any time.
If a different layer is active in the Layers panel, only click on the adjustment layer's thumbnail to reselect it:
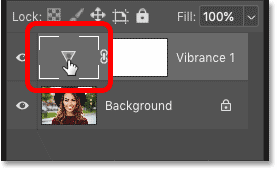
Selecting the aligning layer.
And and then in the Properties panel, make whatever changes you need. I'll reset the Vibrance aligning dorsum to its default settings by clicking the Reset icon at the bottom of the panel:
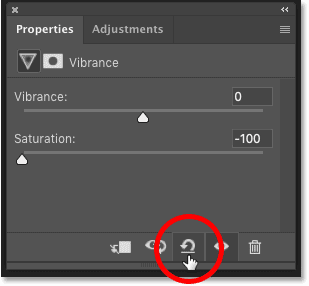
Resetting the Saturation value back to 0.
As I mentioned earlier, the difference between Vibrance and Saturation is that Saturation affects all colors equally while Vibrance affects muted colors more than colors that are already saturated.
To run into the difference, this fourth dimension I'll elevate the Vibrance slider all the way to the left:
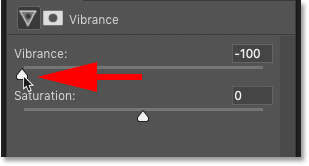
Lowering the Vibrance value.
And notice that even with Vibrance at its everyman settings, some of the original color in the image still remains:
The result after lowering the Vibrance value to -100.
Aligning layers can exist deleted
If you lot make up one's mind not to use the adjustment layer, y'all tin delete it without affecting the original prototype. Only drag the adjustment layer onto the trash bin at the bottom of the Layers panel:

Dragging the adjustment layer onto the trash bin.
And with the adjustment layer gone:
The adjustment layer has been deleted.
The original prototype returns:
Back to the original prototype.
Calculation a different adjustment layer
To see more than advantages that adjustment layers offering, I'll cull a different one. But rather than selecting an aligning layer from the Layers panel, this fourth dimension I'll choose 1 from the Menu Bar.
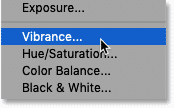
I'll become up to the Layer menu in the Menu Bar and I'll choose New Adjustment Layer. And so from the list, I'll cull Hue/Saturation:
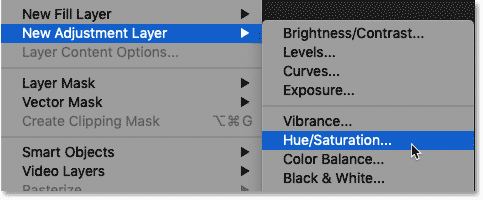
Going to Layer > New Adjustment Layer > Hue/Saturation.
And notice that when we select an aligning layer from the Menu Bar, Photoshop first opens the New Layer dialog box where nosotros can name the layer before adding it. We tin can also fix various options, like the blend manner or the opacity of the adjustment layer.
Nosotros'll look at the blend way and opacity options in a moment. So for at present, I'll just click OK to take the default name:
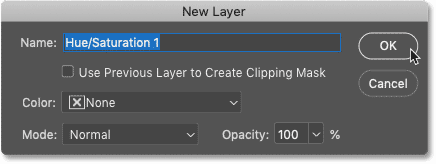
The New Layer dialog box.
In the Layers panel, the Hue/Saturation aligning layer appears above the image layer:
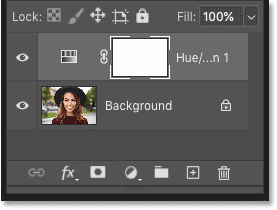
The new adjustment layer is added.
And only like with the Vibrance aligning layer, the Hue/Saturation settings appear in the Backdrop console:
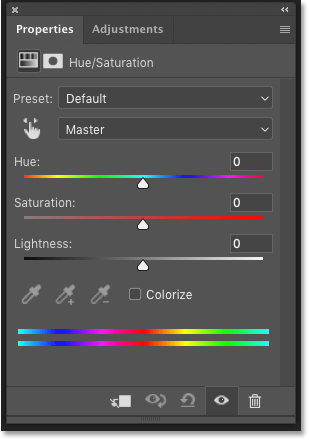
The Backdrop panel showing the Hue/Saturation settings.
Colorizing an image with Hue/Saturation
I'll employ the Hue/Saturation adjustment to colorize the image. In other words, I'll blend a single color in with the original colors.
Start, I'll turn on the Colorize option, and so I'll set the Hue value to twenty to choose a colour that'southward similar to the woman'southward skin tone:
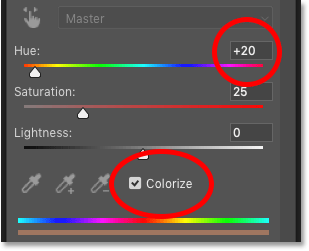
Turning on Colorize and then choosing a hue.
And here's the initial issue:
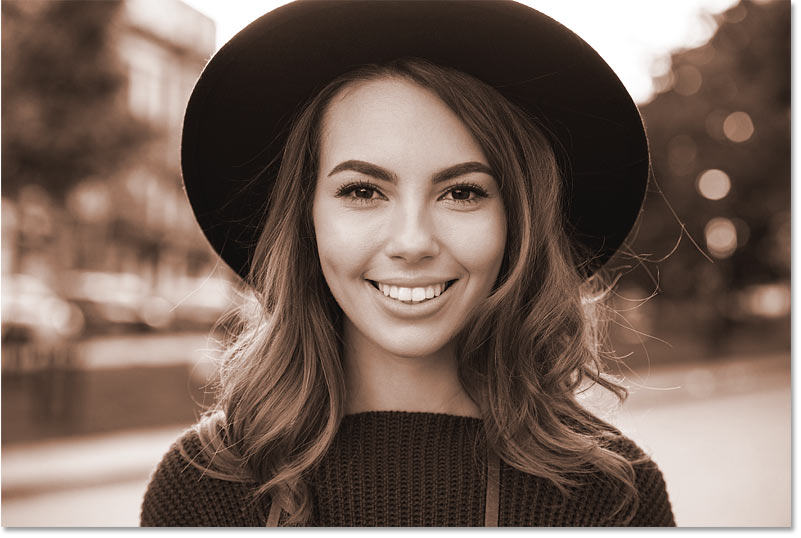
The epitome after colorizing it with the Hue/Saturation adjustment.
Adjustment layers tin can use blend modes
Since adjustment layers are actual layers, merely like image layers, they have access to the aforementioned Blend Manner and Opacity options in the Layers console. And we can use these options to control how the adjustment blends with the image.
For case, we tin change the way the color from the Hue/Saturation aligning layer is blending with the photograph'south original colors by irresolute the adjustment layer's blend mode from Normal to Color:
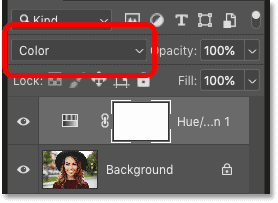
Changing the aligning layer's blend style.
With the blend manner set to Colour, the adjustment layer now affects merely the colors in the image. It has no effect on the luminosity (the brightness). And this gives us a more natural looking result, without the added boost in dissimilarity nosotros were seeing from the Normal blend way (the default setting):
The upshot after changing the aligning layer'south blend fashion to Color.
Related: Work faster with these Blend Manner Tips and Tricks!
Adjustment layers can be faded using the Opacity option
Another advantage with adjustment layers is that the upshot can be faded by lowering the Opacity value, which is plant directly across from the Alloy Mode option in the Layers console.
I'll lower the opacity from 100 percentage down to 50 percent:
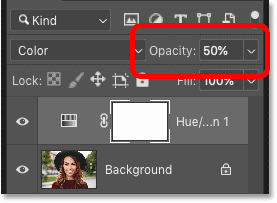
Lowering the Opacity value.
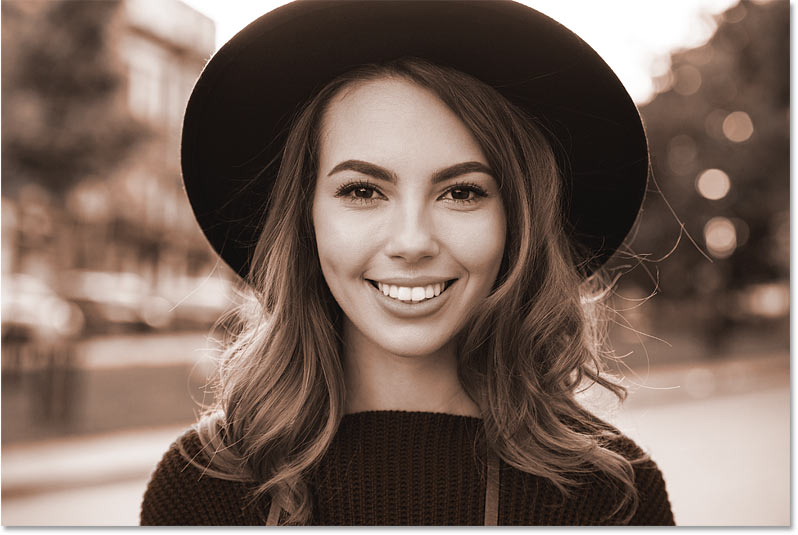
And with the opacity lowered, the effect is less intense. The color from the adjustment layer is now mixing with the photo's original colors rather than replacing them completely:
The result with the Hue/Saturation adjustment layer's opacity lowered to l percent.
Related: How to unify colors in an image
Aligning layers include a born layer mask
Finally, each adjustment layer you add together comes with its ain layer mask which can be used to limit the areas of the image that are afflicted past the adjustment.
For example, I'll employ Photoshop's Select Subject command to quickly select the woman in the photograph.
In the Layers panel, I'll click on my image layer to select it:
Selecting the image in the Layers panel.
And so I'll go up to the Select carte du jour in the Bill of fare Bar and I'll choose Subject:
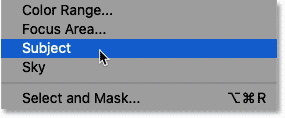
Going to Select > Subject.
Photoshop analyzes the paradigm, and subsequently a few moments, a selection outline appears around my subject field. I can now utilise this selection to hide the adjustment layer from this surface area:
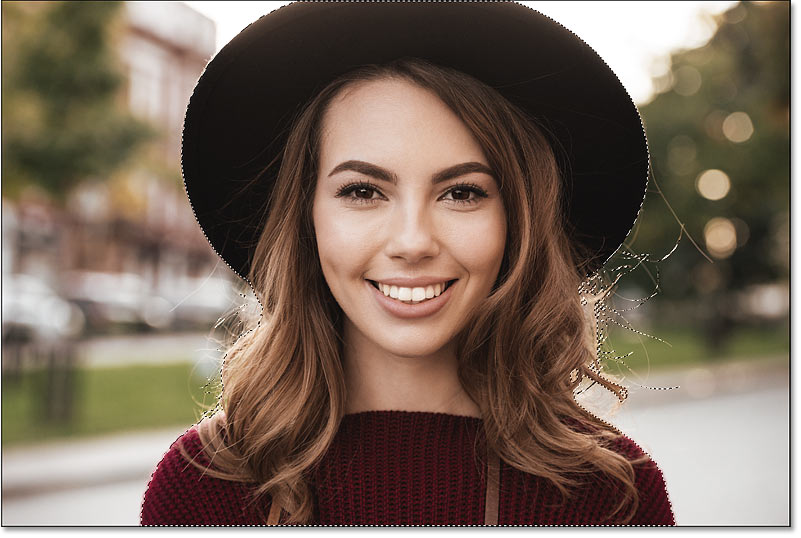
Select Field of study did a great task of selecting the woman without selecting the background.
Dorsum in the Layers panel, I'll select the adjustment layer's mask by clicking the mask thumbnail:
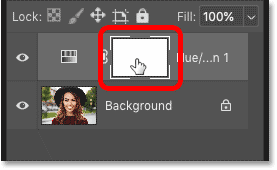
Selecting the adjustment layer's mask.
And and so I'll fill my option with blackness by going up to the Edit bill of fare and choosing Make full:
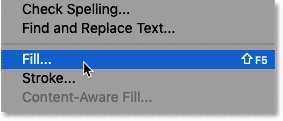
Going to Edit > Fill.
In the Fill up dialog box, I'll set the Contents option to Blackness, and and then I'll click OK:
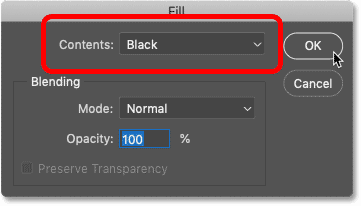
Choosing black for the fill color.
And afterward filling that part of the layer mask with black, the aligning layer is no longer affecting my discipline. The colour effect is being practical only to the background:
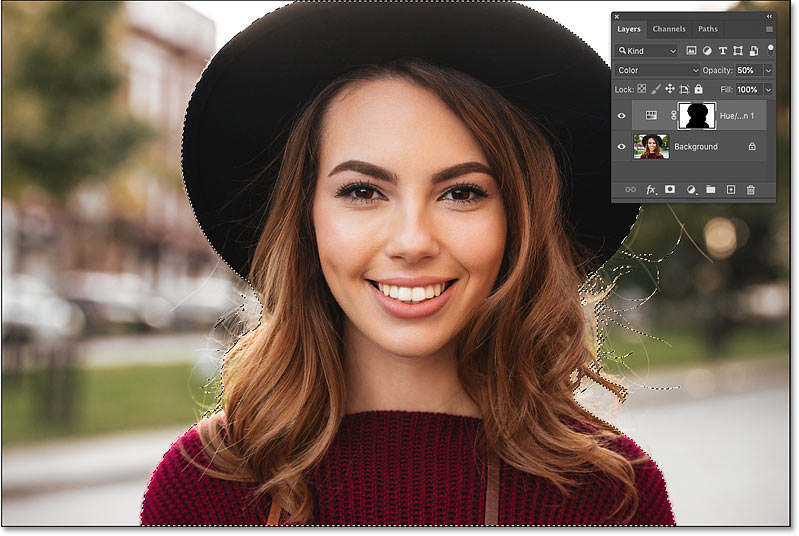
The layer mask makes it piece of cake to hide the adjustment layer from specific areas.
To remove the selection outline from effectually my subject, I'll go up to the Select menu and I'll choose Deselect:
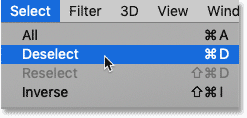
Going to Select > Deselect.
How to save your work and go on your adjustment layers
At this point, we've looked at all the reasons why adjustment layers are so much better than Photoshop's standard image adjustments. They keep the adjustment divide from your image, they keep your settings flexible and editable, and they can be turned off or even deleted without needing to undo a bunch of steps.
Y'all tin can fade an adjustment layer by lowering its opacity, or modify how the adjustment blends with your image by choosing a different alloy mode. And you can even control which areas of your image are afflicted by the adjustment layer using its born layer mask.
Only all of your adjustment layers will exist lost forever if you save your work as a JPEG or PNG file and and then close out of Photoshop. That's considering JPEG and PNG files (and most other file formats) do non back up layers. To continue your aligning layers intact, make sure y'all save your piece of work every bit a Photoshop .PSD file. You lot'll then be able to open the .PSD file at any fourth dimension and make any changes you lot need.
How to save the file as a Photoshop document
Go up to the File menu and choose Save Every bit:
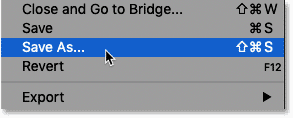
Going to File > Save Every bit.
In the most recent versions of Photoshop, you'll be asked to cull between saving your work every bit a Cloud document or equally a file on your computer. In most cases, you'll want to choose Save on your computer:
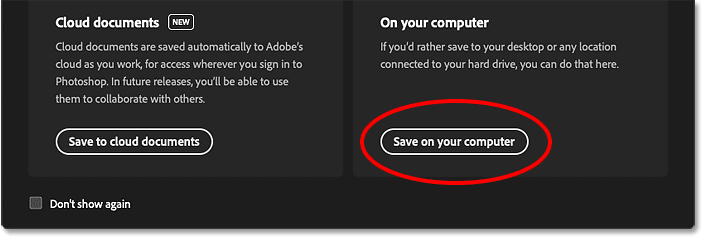
Choosing the "Save on your figurer" choice.
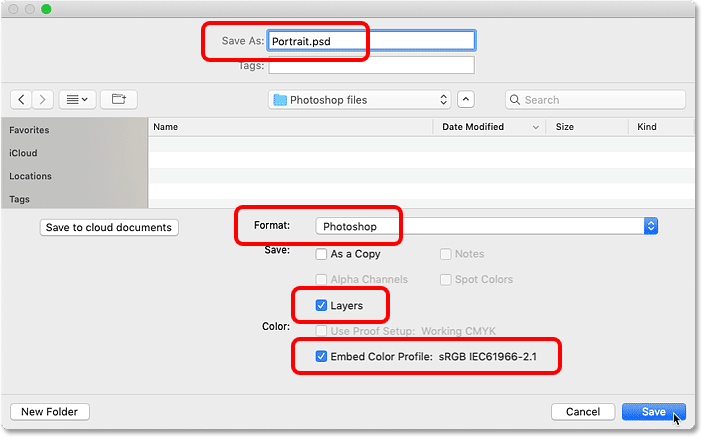
Then in the Save dialog box, outset by changing the Format to Photoshop. Make sure Layers is checked, and it's a skillful idea to select Embed Color Profile as well.
Give the file a name, and and so click Save:
Saving my work as a Photoshop .PSD file.
Finally, if the document volition non be opened in any plan other than Photoshop, you tin can keep the file size smaller by unchecking the Maximize Compatibility selection. And then click OK to close the dialog box and your certificate is saved, along with your aligning layers:
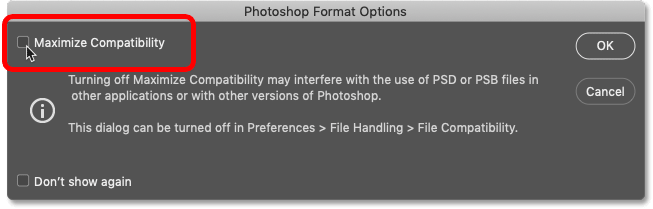
Unchecking "Maximize Compatibility".
And there we have it! That's our await at why you should stop using standard epitome adjustments and beginning using adjustment layers in Photoshop!
Check out our Photoshop Basics department or our Photograph Editing section for more tutorials. And don't forget, all of our Photoshop tutorials are available to download as PDFs!
Other Stuff
© 2022 Photoshop Essentials.com.
For inspiration, not duplication.
Site blueprint by Steve Patterson.
Photoshop is a trademark of Adobe Systems Inc.
Source: https://www.photoshopessentials.com/photo-editing/adjustment-layers-in-photoshop-and-why-you-should-use-them/
Posted by: gadberryficirdly.blogspot.com
0 Response to "How To Create Adjustment Layer In Photoshop"
Post a Comment